visionOS - Positioning and sizing windows

Hi,

In the visionOS documentation

Positioning and sizing windows - Specify initial window position

In visionOS, the system places new windows directly in front of people, where they happen to be gazing at the moment the window opens.

Positioning and sizing windows - Specify window resizability

In visionOS, the system enforces a standard minimum and maximum size for all windows, regardless of the content they contain.

The first thing I don't understand is why it talk about macOS in visionOS documentation.

The second thing, what is this page for if it's just to tell us that on visionOS we have no control over the position and size of 2D windows. Whereas it is precisely the opposite that would be interesting. I don't understand this limitation. It limits so much the use of 2D windows under visionOS.

I really hope that this limitation will disappear in future betas.

I agree and filed a feedback for this. Why in the world you can set a volume to be 300x300x1 and not a window is beyond me.

Also the problem with just displaying 2D content in a volume is that the ”window grabber bar” moves around the volume and the user could end up looking at the side of the plane and not see anything.

Can we dive into UIKit to change the window size dynamically?

One of the big advantages of visionOS is that we are not limited by the use of a physical screen as is the case with an iPhone, an iPad or a Mac.

Concretely, this means that we can have an application that must be able to put windows where we wants in the visual space of the user.

For example, I invite you to look at the models made by Nicolas Backal (https://www.linkedin.com/in/nicolasbackal/recent-activity/all). Its models are really very interesting and show the potential that the Apple Vision Pro can offer in terms of interface design. This kind of design can only be possible if the application has control over the windows it creates, which does not currently seem to be the case.

Screenshot1

Screenshot2

This is the biggest confusion caused by documentation right now.

You can achieve what ZeTof is showing in VisionOS by using RealityKit's attachment closure to position SwiftUI views in 3D. See a demo here: https://twitter.com/tracy__henry/status/1680811420903165953

@tracyhenry is correct, you can utilize the attachments API to position views within a RealityView. This is not quite the same as positioning a window (for example, windows have close buttons, and system behavior allowing the user to resize or move them around). Additionally, the sorts of things you are trying to do (based on the screenshots) would require an ImmersiveSpace, which has other behaviors you might not have considered yet, for example, "When your app opens an immersive space, the system hides all other visible apps."

In general though, I agree with @tracyhenry that you can create the UIs shown in the images by utilizing the attachments API within an ImmersiveSpace.

You can do this by diving down into UIKit, but it requires some clever SwiftUI work if your app is SwiftUI based. (Most new VisionOS apps will be).

If anyone picks up some mistakes in my SwiftUI explanations, or has some code improvements please call them out in the comments.

The View

struct ContentView: View {
    @EnvironmentObject var windowSceneBox: WindowSceneBox
    var body: some View {
        ZStack {
            Text("hello")
        }
        .glassBackgroundEffect()
        .onChange(of: windowSceneBox.windowScene) { old, new in
            new?.sizeRestrictions?.maximumSize = CGSize(width: 500, height: 500)
        }
    }
}

As you can see, when the scene of the view is set, the onChange fires and it immediately sets the size of the windowScene via the sizeRestrictions property. The VisionOS window-launch screen will appear large, and then animate smaller after the view loads.
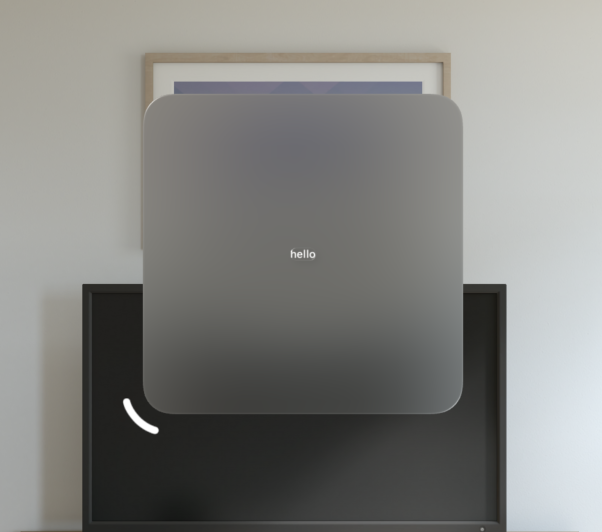
This image shows the window-resize chrome at the appropriate location for a 500x500 window (because it is!)


What the heck is a WindowSceneBox?

I like using SwiftUI environment variables for things like this, but because the view is added to a scene After it initialized I needed an optional property. I chose to wrap it in a "box" type, though there are other ways to achieve an optional Environment variable if you wanted to explore them.

This is just an observable object with an optional scene property. It's what that .onChange is listening to.

class WindowSceneBox: ObservableObject {
    @Published var windowScene: UIWindowScene?
    
    init(windowScene: UIWindowScene?) {
        self.windowScene = windowScene
    }
}

Where is the environmentObject set?

In the window group:

        WindowGroup {
            WindowSceneReader { scene in
                ContentView()
                    .environmentObject(WindowSceneBox(windowScene: scene))
            }
        }

Similar to a GeometryReader, I made a View that will watch for the UIScene that a view is assigned to. I named it WindowSceneReader, and similar to GeometryReader, you provide it with a view to display.

Looks Great. Now what the heck is a WindowSceneReader?

struct WindowSceneReader<Content>: View where Content: View {
    @State var windowScene: UIWindowScene?
    
    let contents: (UIWindowScene?) -> Content
    
    var body: some View {
        contents(windowScene)
            .background {
                WindowAccessor(windowScene: $windowScene)
                    .accessibilityHidden(true)
            }
    }
}

The sceneReader is initialized with generic Content returning closure with a UIWindowScene parameter. The reader maintains the UIWindowScene as its state, so when it changes, it will re-render its body, and therefore invoke the Content closure again.

What sets the windowScene property? How do we tie into UIKit?

In the WindowSceneReader the Content is wrapped in a .background modifier. Within that background is a WindowAccessor that we pass our windowScene State too as a Binding.

This view is:

struct WindowAccessor: UIViewRepresentable {
    @Binding var windowScene: UIWindowScene?

    func makeUIView(context: Context) -> UIView {
        let view = UIView()
        DispatchQueue.main.async() {
            self.windowScene = view.window?.windowScene   // << right after inserted in window
        }
        return view
    }

    func updateUIView(_ view: UIView, context: Context) {
    }
}

WindowAccessor is a represented UIView whose responsibility is to grab the windowScene after it's been installed in the hierarchy.

The Chain of Events:

  • The WindowAccessor is an empty UIView that sets the view's windowScene into the Binding. We make it an invisible background of a view.
  • This binding is a @State of the WindowSceneReader and detects the scene being set. This causes it's content to be recreated, and provides the window scene when it does so.
  • The Content of the WindowSceneReader is the rest of app window's view hierarchy
  • The Content of the WindowSceneReader takes the windowScene provided by the reader and sets it into an EnvironmentObject so it's available throughout the entire window's view hierarchy via @EnvironmentObject
  • Our window's ContentView see's that the windowScene is available and sets the sizeRestrictions, causing the VisionOS window to animate smaller.

Wow that's a lot. What about UIKit?

Just grab a UIView's .window?.windowScene property and configure the sizeRestrictions on it.

@J0hn it works perfectly to resize the window! 👍 😁 To position a window in the user's visual space do you have a trick to do that?

Thank you all for your answers. 👍 😁

Good news to resize a window!

With Xcode 15 Beta 5 no need to use a trick to resize a window just specify .defaultSize(CGSize(width: 400, height: 400))

TestApp.swift

import SwiftUI

@main
struct TestApp: App {
    var body: some Scene {
        WindowGroup {
            MainView()
        }
        .defaultSize(CGSize(width: 400, height: 400))
    }
}

MainView.swift

import SwiftUI

struct MainView: View {
    var body: some View {
        VStack {
            Text("MainView")
                .font(.largeTitle)
        }
    }
}

Screenshot

Changing the position of a window

With Xcode 15 Beta 5 this is not yet supported

hey all, I see many asking about how to place a window programmatically ( @jtuinhout I see you most recently).

Try this using defaultWindowPlacement:

@main
struct TestApp: App {

    var body: some Scene {
        WindowGroup(id: "content") {
            ContentView()
        }

        WindowGroup(id: "sideWindow") {
            Text("test")
        }
        .defaultWindowPlacement { content, context in
            
            return WindowPlacement(.trailing(context.windows.first(where: { $0.id == "content" })!))
        }

     }
}

This will place the window on the trailing side. You can change this to be a utility panel, leading, above, below, etc.

visionOS - Positioning and sizing windows
 
 
Q